So, you’ve got the game installed, you can walk around, you may have even punched a tree or two. Unfortunately the other members of the lostdorks look cool as hell and are saying things like “I’m at 127x,-1283z” and you are thinking “WTF are they smoking?!?”. here we’ll look at how to set a skin for your minecraft avatar and the debug screen for minecraft 1.7.10 (the 1.8.x debugging is slightly different).
Skinning
Goto: http://www.minecraftskins.net/
Find a skin you like, download it to your computer.
Goto: https://minecraft.net
Login with your credentials and select “Profile” at the top. You will get a screen with a section like this:
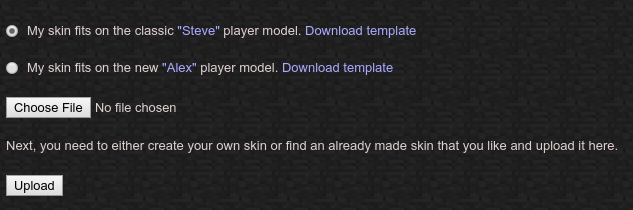
Click “Choose File” and select the skin file you downloaded. Then click “Upload”. Now just launch the game and login to the server. Then hit ‘F5’ on your keyboard once, then twice, to view your skin. If the arms look messed up, or the whole skin is messed up repeat this process but select the “Alex” option above. The skin may have been updated for the new models. If neither the Steve or Alex skin looks right just download another skin as they could be messed up, or get the template and make your own!
The Debug Screen
In minecraft, you can access a debug/info screen by hitting ‘F3’. This screen is often used by experienced minecraft players to identify their position in the world and relay it to others .If you have map mods installed (Journeymap for instance) you don’t really need this as the mini-map will often give your position to you but for lighter mod packs it is useful to be familiar with this screen.
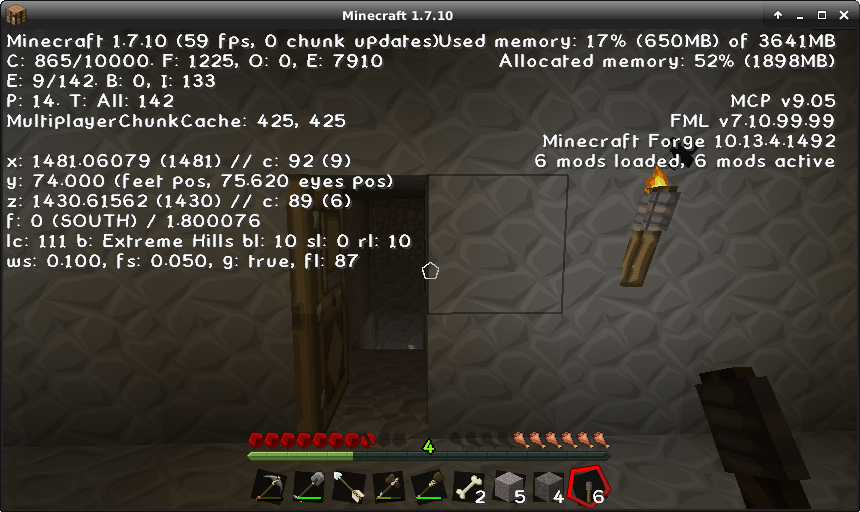
There are a lot of bits of info on here, but the main ones you want to know are x:, y: and z:. The minecraft world is oriented so the X axis is your east/west axis, z is your north/south axis and Y is the vertical axis. A conventional minecraft world can run from +29999998 to -29999998 N/S and E/W with 0,0 as the center. The y axis runs from 0 to usually +256.
If I were to give my location over chat from this window I’d say I’m at 1481,1430, ignoring the Y axis as typically it isn’t required to locate someone.
Another super handy value on this screen is ‘f:’. This is the ‘facing’ value. You can see that mine says 0 (south), this bit is just south, there are only 4 facing values, 0-3. The second value on that line is 1.8. this is the number of degrees from 0 i am currently facing. 0 degrees is due south. -180 (or +180) is due north. 90 is due west, -90 is due east.
Where the facing value really gets confusing is that if I were aimed “f: 1 (west) / 90.0” I’d be travelling toward the negative X axis. Basically, for x/z your movement is current position minus degrees in that direction. its more complex, but for navigation thats the way to do it. So, if someone is smaller X than you, go west, smaller z, go north.
Texture Packs
Minecraft allows you to skin the game with resource packs (replacing textures). You may notice in the above screenshot that my minecraft walls and torches and tools look different than yours. There are a great many texture packs to choose from. I personally like the Sphax style textures. They make things pretty cartoon like which for minecraft suits me. There are some ultra-realistic packs, some crazy theme based ones (like my little pony). Textures are personal preference and a lot of people just go with default.
Resources
The thing about texture packs is that they take resources. Textures are measured in their bit size. By default minecraft textures are 16bit. The textures in the screenshot above are 128bit. You can download the two packs I’m using as a single file here:
Agathezols LD Basic Textures: http://www.lostdorks.com/vanilla-textures.zip
When a texture says it is 16bit what it is saying is that each texture panel is 16 pixels wide. Most textures for icons are square, so a 16bit texture is 16×16 pixels or 256 pixels in size. A 256bit texture is 65536 pixels in size, that’s 256 times as large as the default texture. Every picture, icon, dirt block, tree bark, etc in minecraft is a texture. As you can imagine increasing the texture size can use a lot more resources, this is why i previously posted about how to increase ram in minecraft. If you use the vanilla-textures I linked above be sure your game is set to use at least 2gig of ram, I personally use 4 gig typically.
Adding Textures
To add the above textures just download the zip file, and decompress it. Inside there are two other zip files, “Sphax PureBDcraft 128x MC17.zip” and “Sphax128x_BOP_Ver2.1.0.960.zip”. Launch minecraft, and click “Options…”, you’ll get this screen:
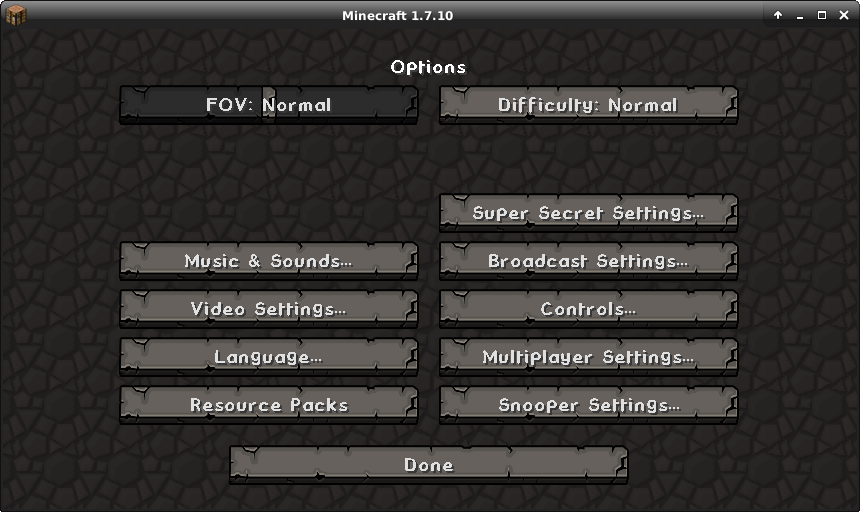
From there, click “Resource Packs”, you’ll get:
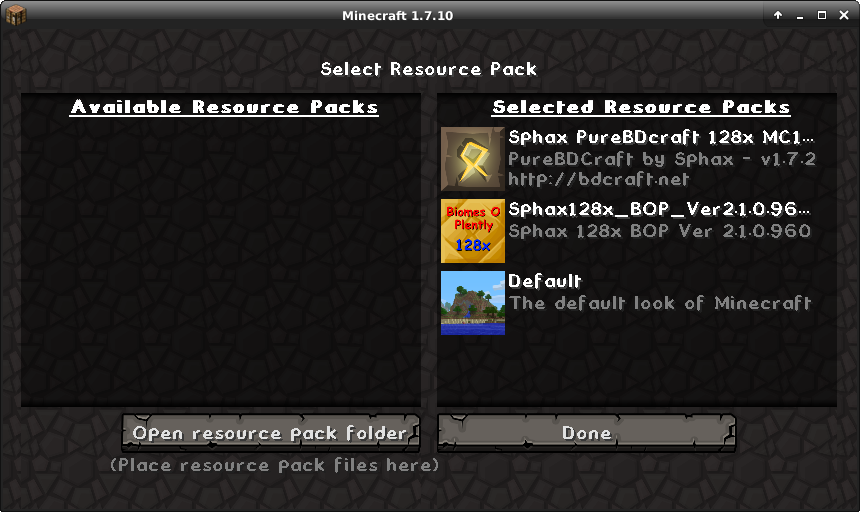
here click “Open resource pack folder” and drag the two zip files you got out of the vanilla-textures archive into that directory. Then come back in here, hit done, go back into resource packs, and the should be on the left, just click them and they will move to the right as shown above. Then click done. It will sit here like it is locked up, it isn’t, it’s loading the new textures and when finished will return you to the options screen and you should be good to go.